Guest database
The guest database contains absolutely all entries about guests taken from bookings, which have come to you from booking sites, booking engines, or ones that you have manually created in Previo. Each entered guest has a database entry, which contains all of the data that you have entered into his/her guest card during the booking (name, address, date of birth, nationality, document number, license plate number, email, phone number, or other guest labels and comments assigned to this guest).
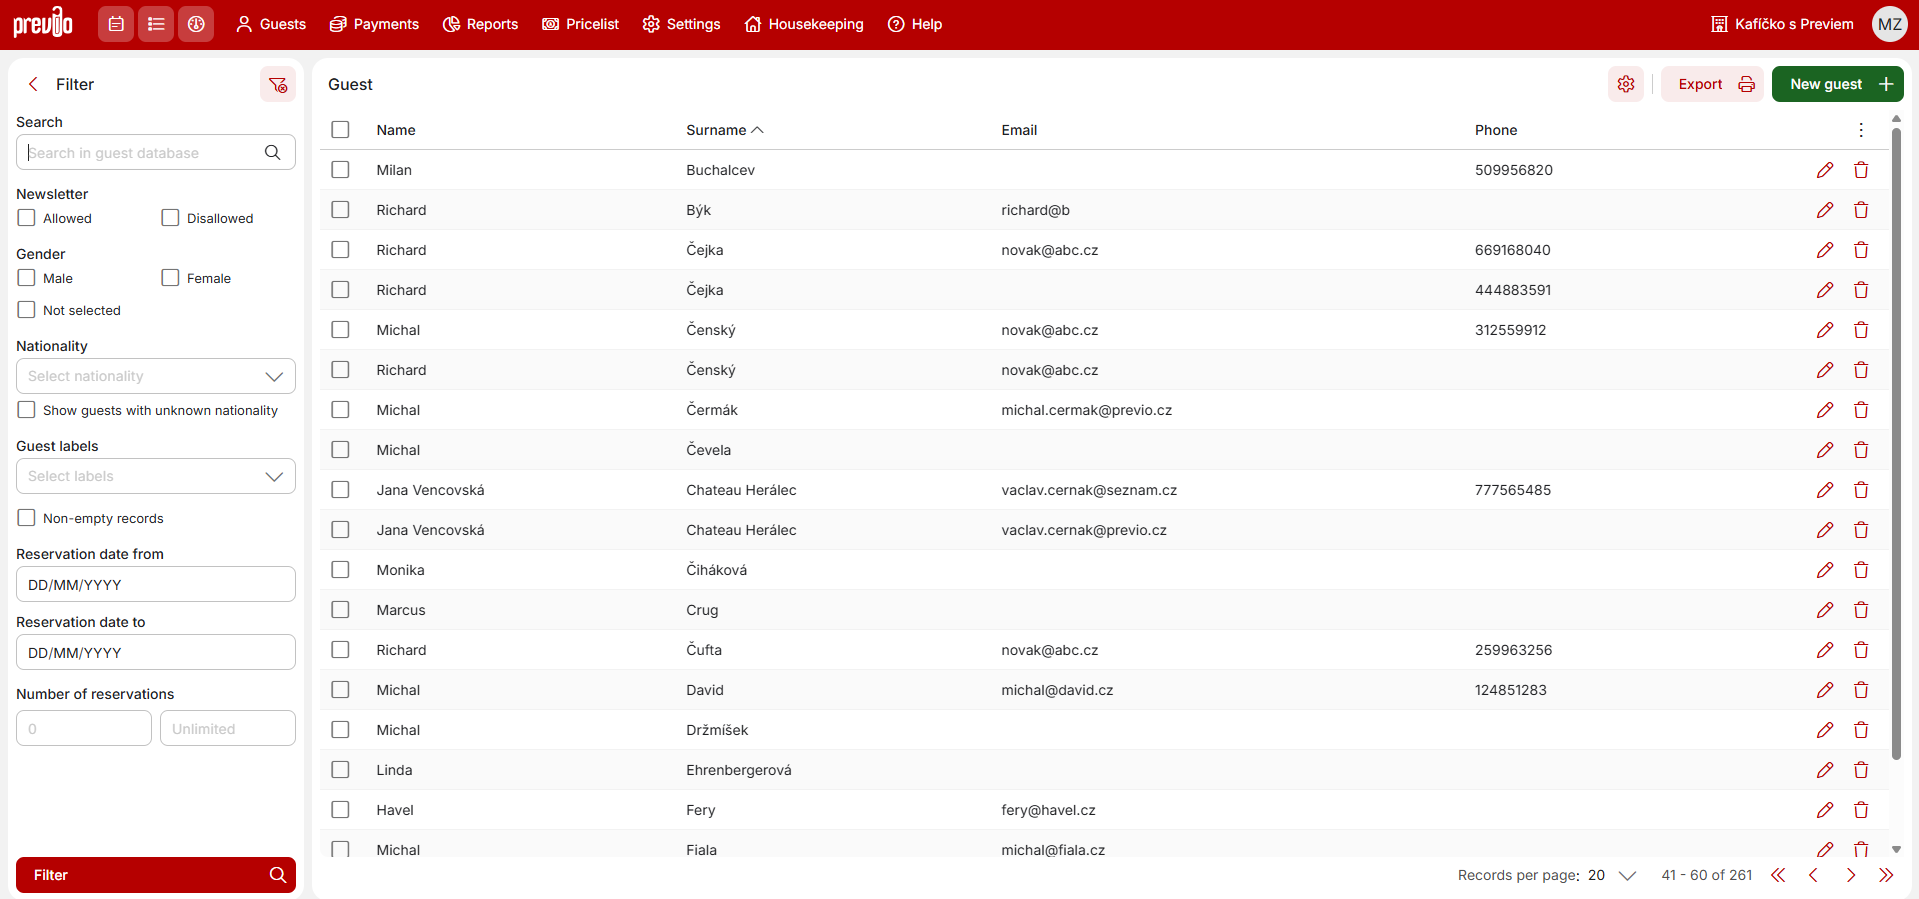
In the guest database, you can filter and search for guests using either full-text search (by company, name, phone number, etc.) or other search categories such as guest category, total number of reservations, or tags. All filtering options can be combined in the left panel.
To the right above the table, you can add a new guest record. Creating a new guest is the same as filling out a guest directly in the reservation on the guest tab. Enter all available information you have about the client. After saving, this guest will appear in the autocomplete suggestions when entering guests into a reservation after typing the first few letters of their name (email, etc.), and upon selecting this guest from the autocomplete, all previously entered data will be automatically populated into the guest card.
The “Export” button (also in the top right corner) exports your filtered selection of guests to a CSV file. After editing, this file can be used, for example, to send email campaigns via an application like MailChimp. If you use the Mailing module from Previo, you won’t need this export at all. All mailing recipients are then generated directly from the database without the need to export data to separate files.
The content of the CSV file depends on the columns displayed in the guest database; if you want complete information about all guests, you need to display the other columns as well (address, etc.).
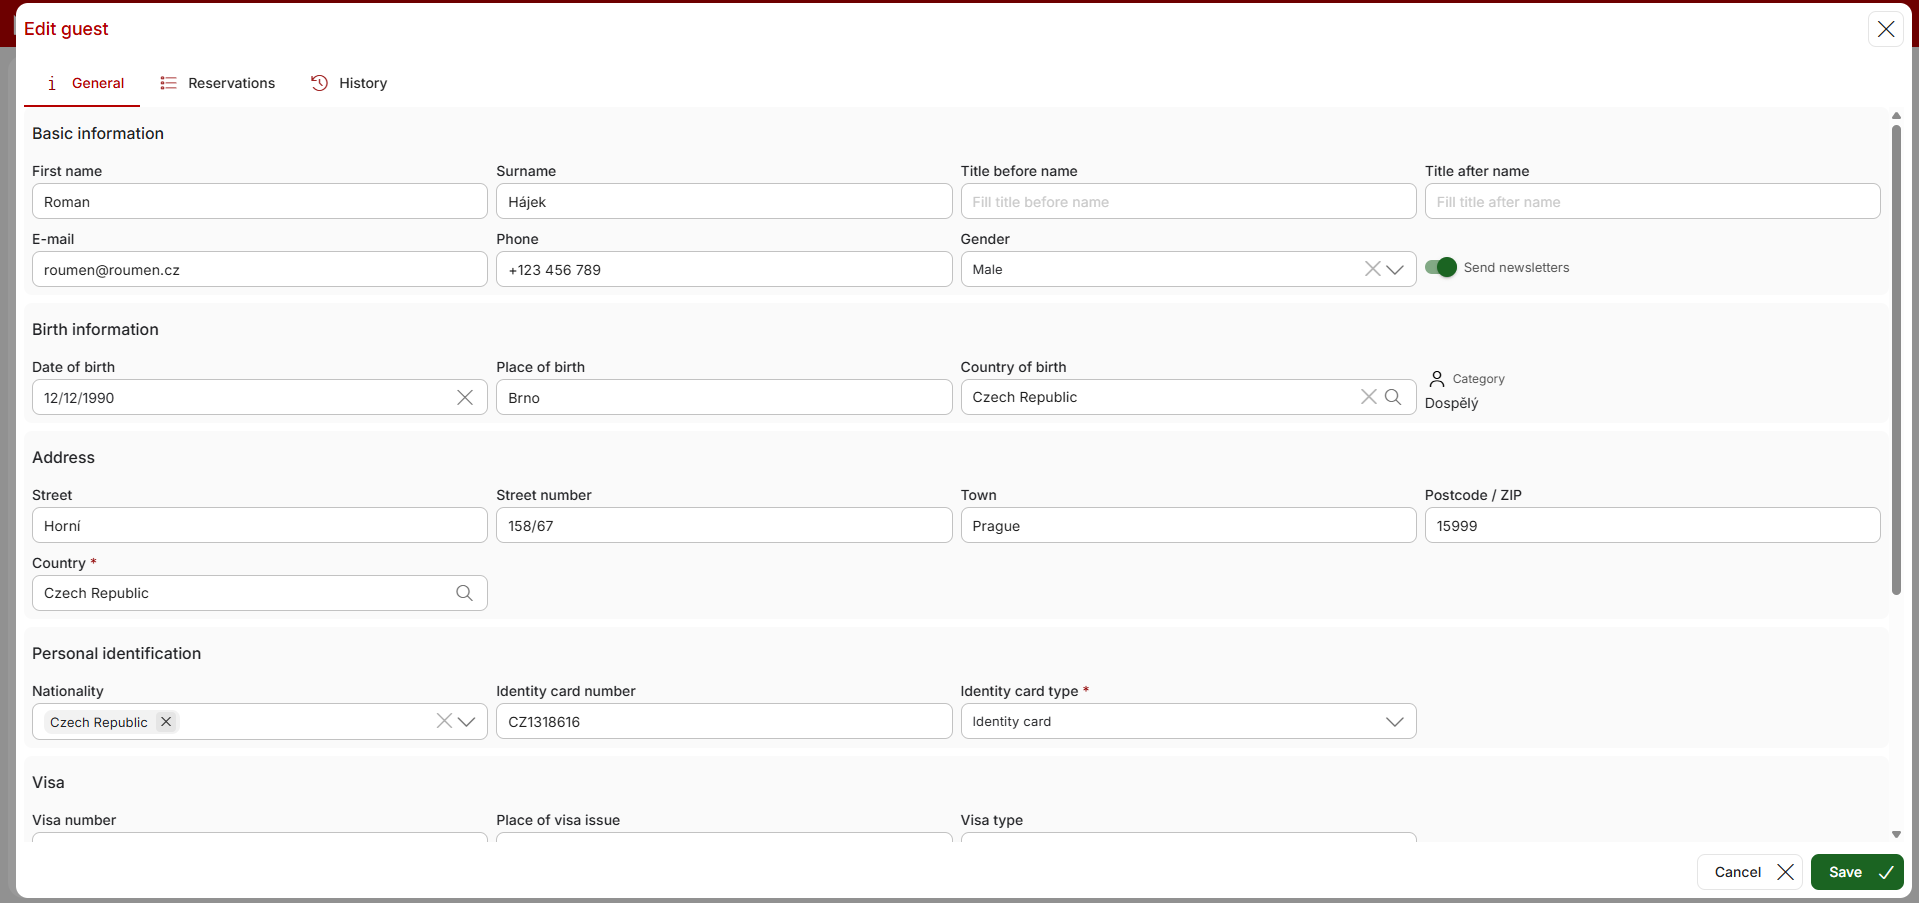
By clicking the pencil icon (or double-clicking a row) for each individual guest, you’ll access that guest’s profile (the same window as when filling out this profile directly in the reservation). Here, you can edit all available information about the guest in the first tab, while the second tab of this window displays the guest’s complete reservation history. The last tab contains the guest’s “history,” i.e., information about edits made to this guest’s records.
Settings
To the right of the guest list, you’ll also find a gear icon. Clicking it will take you to the separate “Guest and Companies” settings.
In the main “General” section, you can set up birthday reminders for guests, configure the default guest nationality, print electronic signatures, and set the default purpose of stay.
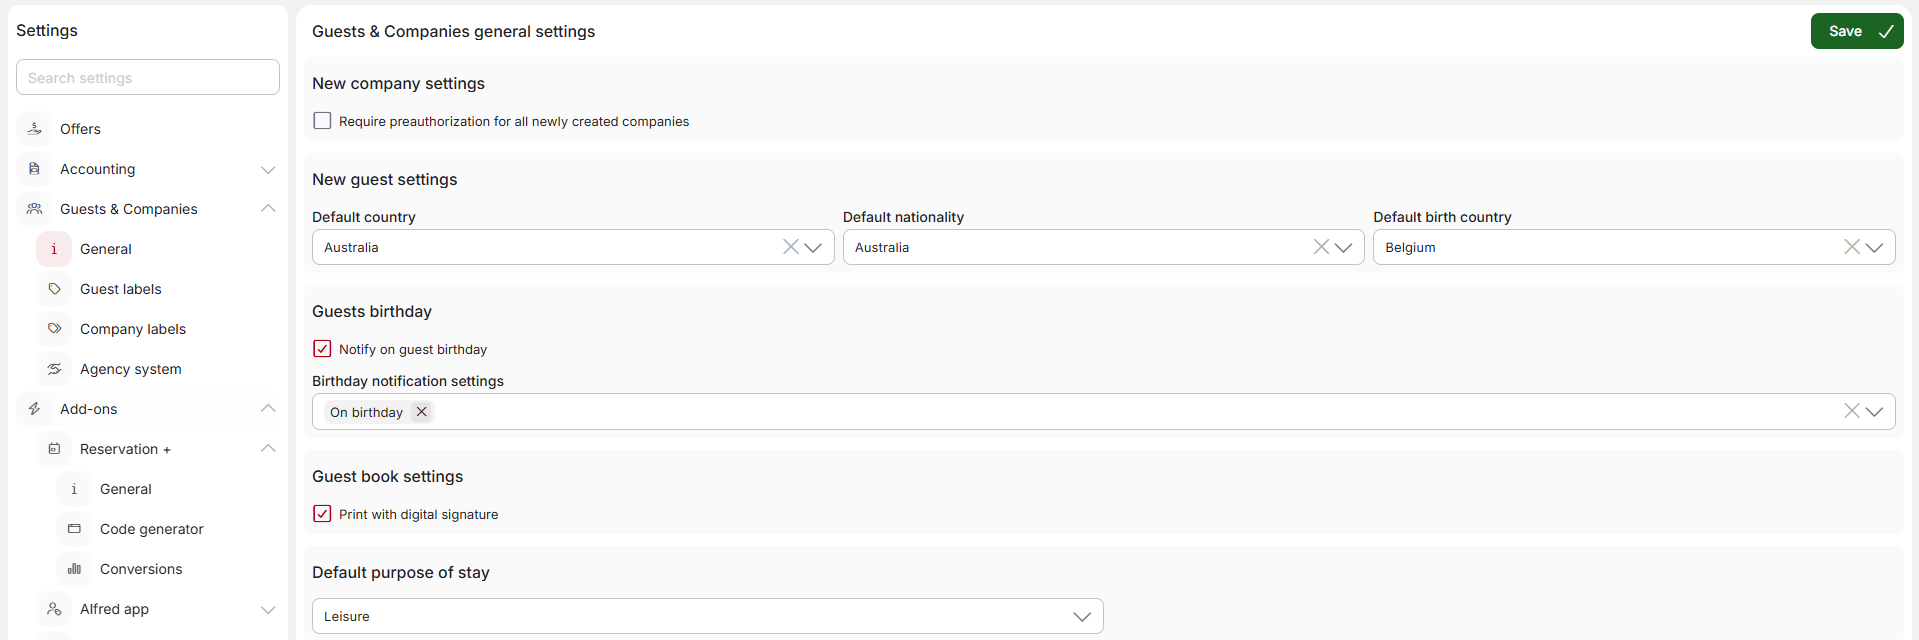
The default nationality/country is preset based on the hotel’s location. However, if most of your guests are tourists from a specific region, you can change this setting. We recommend changing only the country of the address and leaving the other fields blank. You also have the option to leave the address country blank, in which case you’ll always need to enter it manually.
For birthdays, you can choose whether you want to be notified at all and, if so, set how far in advance the notification will appear (in the top blue information bar).
Guest electronic signatures can be collected during online check-in via the Alfred app and can subsequently be displayed for specific guests when printing the guest register and house book.
The default purpose of stay is the information sent to the Foreign Police when reporting foreign nationals. The default setting is “leisure,” but you can change it as needed, for example, if the majority of your clientele consists of corporate clients.
In the next settings section, you’ll find guest label management. You can use labels to sort guests into different categories and work with them further. Based on tags:
- You can target email campaigns
- +You’ll see a notification about assigned tags when you add a guest to a reservation

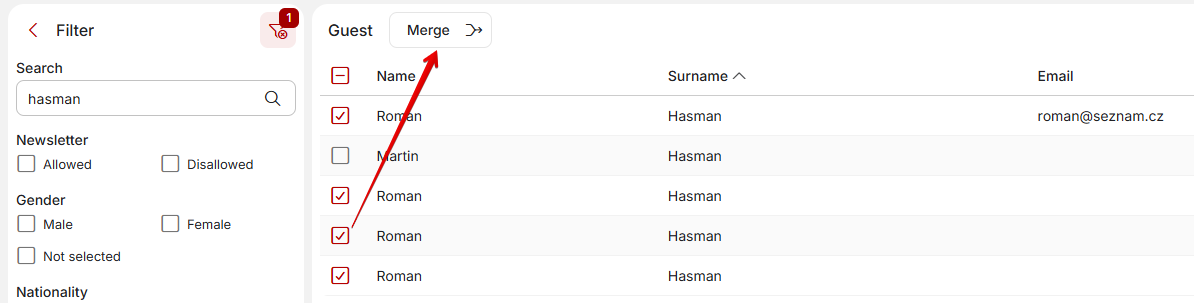
Guest management
You can also merge guests if duplicates appear in the system. Simply filter by the specific name, select the individual records, and click the “Merge” button to combine them. In the window that appears, confirm which record all duplicates should be merged into.